A peek into my method of preparing my makeup kit for an upcoming job…
…One thing about being a freelance makeup artist…
is that two days are rarely ever the same. If you follow my makeup artist feed on Instagram, you’ve seen many posts of my various makeup kits and set-ups. More often than not I am carrying a smaller kit because I’m working with one of my commercial clients and I can carry a more curated kit. Every once in a while, however, I need to carry the entire kit and caboodle, so to speak. This requires some special kit prep in order to be ready for my gig.
There are certain things I ALWAYS do before a job, and some things that I do that are specific to the job I’m working on.
Makeup Kit Prep I Always Do BEFORE A Job
– Wash makeup brushes
– Barbicide Hair Brushes/Tools
– Wipe down palette surfaces and lotion/bottle openings with alcohol
– restock liquids and consumables (alcohol, brush cleaner, tissues, sponges, cotton swabs, etc.)
notice how all but one pertains to kit sanitation, which as I mentioned in a past post I take very seriously. I need everything to be clean, dry and ready BEFORE I show up for a job therefore I generally take care of all of these things when I get home from my previous job (i.e. – I did all of this Friday night so that come Sunday morning everything was dry and ready).
On Emmys weekend I was booked to work with the brand Gwynnie Bee on a combo photoshoot/Emmys watch party. Major influencers were there along with two major celebs so it was a high profile event. Nothing I haven’t done before, however, I’d not worked with this client before and I also wasn’t entirely sure how many talent I would ultimately end up working on. Therefore, I also had special kit prep for this specific job. This was one of those jobs where I had to a) have Top Shelf product b ) my presentation had to be on point (which it should be at all times anyway), and C ) I had to be prepared for any and everything.
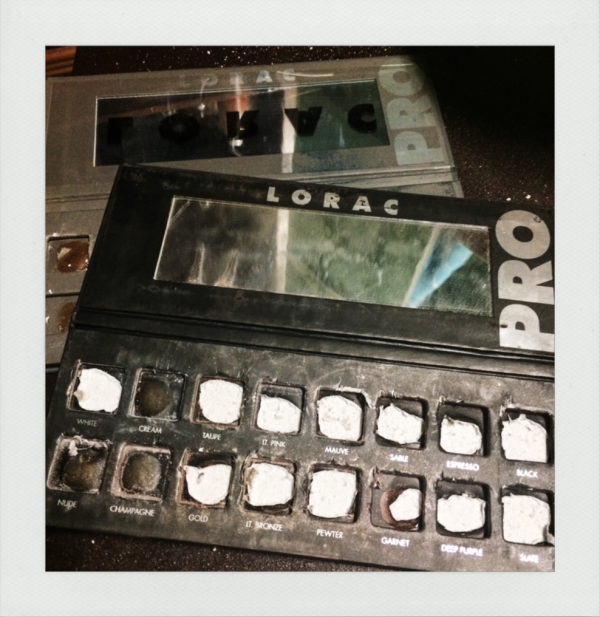
LORAC PRO eyeshadow palette 1 & 2 depotted into Make Up For Ever large empty palette
Something I’ve wanted to do for more than a minute is depot anything that’s currently in a retail palette/package into a Pro empty palette. Why? First of all, space. When you’ve gotta bring the kitchen sink you need as much product to fit into as compact a space as possible. It’s also easier to see what I have in a palette like this as opposed to 50-lebbin little individual palettes. Secondly, on the real, retail packaging was not meant for the abuse of traveling around in a pro kit and they usually end up looking like crap. Look at those LORAC palettes and then look at the Make Up For Ever palette. Which one looks better? Yeah. Presentation matters.
PRO TIP: The LORACs came out easily because the body is cardboard and foam. For products in plastic packaging you will need more finesse so as to not damage your product.
PRO TIP 2: Non-pros; make a palette out of your powders and creams (eyeshadows, blushes, bronzers, highlighters, etc) and packing your makeup for trips will be a breeze!
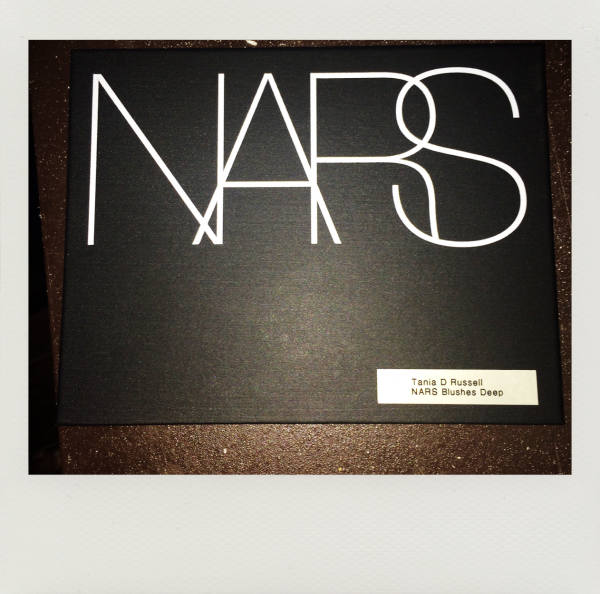
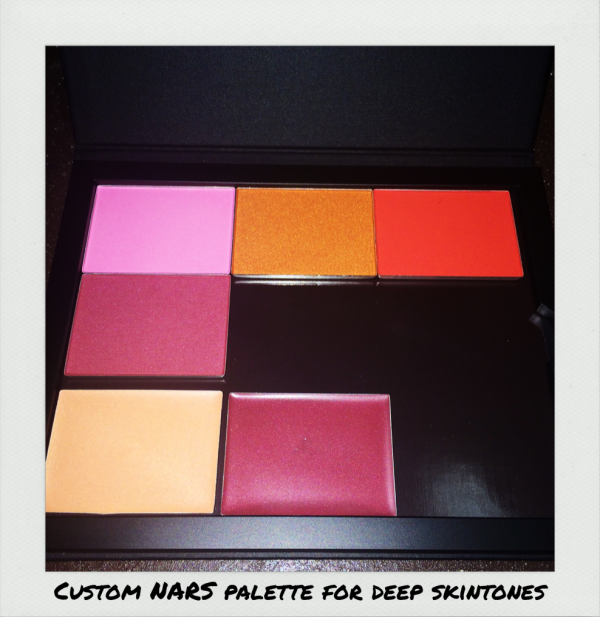
NARS Blushes in a NARS Small Pro Palette
Likewise, as I’ve mentioned in numerous past posts, I needed to get it together with my blush choices for deep complexions. This palette was the Belle of the Ball as many of the influencers fell into the color range and I thoroughly enjoyed showing them how to play with blush colors to get different effects. As mentioned in my SF Haul post, the powder colors are Desire, Taj Mahal, Exhibit A and Seduction. In addition I added two cream blushes; Enchanted – which I love as a subtle highlight on pretty much every skin tone, and the mighty Montenegro which is just Flat. Out. Gorgeous.
DEPRESSING NEWS: Typical NARS-ness, they seem to have discontinued their cream blushes. 🙁 If you find them on eBay or somewhere, nab them. And add Penny Lane, too.
PRO TIP: I always label my palettes. A ) so I know what’s in it, but also B ) I love everyone but I want it to be clear that this item belongs to me. This is particularly important when you’re working in close quarters with other artists.
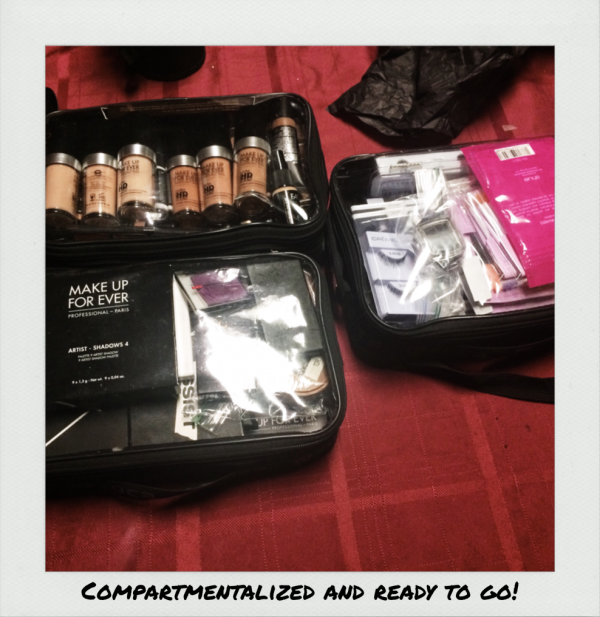
Kit Organized into individual ZUCA Utility Pouches
Once I have everything streamlined and organized, it’s time to pack it up. I know some artists just put things wherever in their kits and I don’t judge (well, maybe a little….OK I do…), but I cannot work that way. It slows me down too much if I have to look for things, so I compartmentalize HARD CORE. Every category has its own bag, that way when I get to location and see where I’m going to be set up I only pull out what I need and I can leave the rest on standby. Pictured here are my foundation/concealer bag, color products bag, and my eyelashes bag which saw a LOT of action on this job! Other main compartment bags in my kit are skincare, powders, cream blushes, and pencils. And actually right after this job I ordered another ZUCA pouch so I can split up the color products (one for eyes, one for cheeks/lips).
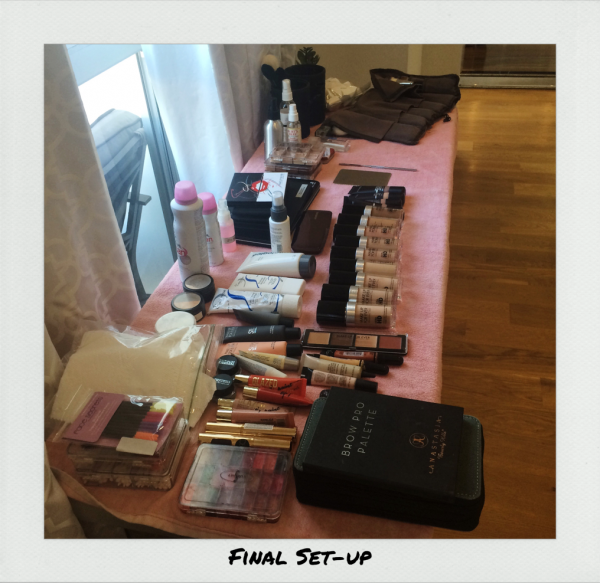
And the final outcome…
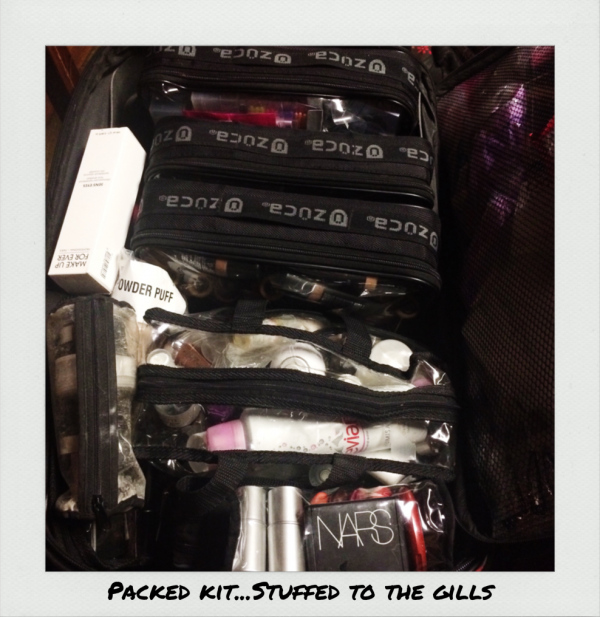
Lean, mean, makeup machine. Not pictured is my suitcase which I was able to put neatly under my worktable in the event I needed something that I didn’t pull out of my kit. Different jobs require different kits but one thing remains the same: A well-prepped kit = a happy makeup artist.
PRO TIP: It is INCREDIBLY important to be clean, organized and efficient on your jobs, but particularly those with high profile clients.
PRO TIP 2: MANY MANY THANKS to Make Up For Ever for providing product for me for this event!
Do you change kits depending on your jobs or does your kit remain the same? How to you prep before your jobs?
—-
Have you signed up for the Makeup to Go Blog newsletter yet? Join the fun for exclusive content, giveaways, and other assorted fabulosity! Makeup to Go Blog Newsletter – “Speaking of Makeup”
Disclosure: Hey folks, instead of doing sponsored posts, Makeup to Go is a member of ShopMy, Amazon Affiliates, and Skimlinks. If you purchase something via any of our links, we get a lil sumthin sumthin to help us keep running, at no additional cost to you. Thanks much!
© 2016 – 2024, Tania. All rights reserved.


Yeah I agree. Depotting is the way to go. Also, I didn’t get into it in that post but I will in a future post; I actually have multiple kits. 😉
Thanks much for reading and commenting.
Thanks for sharing 🙂 Love that palette for deep skin tones and so happy you shared what colours they are. I used to pack less and change my kit more often. I’ve taken to depotting every single shadow, palette and lipstick I own – definitely one of the best ways to increase time efficiency and such a better way to compare colours and textures, especially of colours from different palettes! Thanks again. Love your posts. x
Thanks much for reading and commenting 🙂
Great blog post on makeup, Which I love. Thanks for sharing