Revisiting the options for carrying a makeup kit and how my kit has evolved…

Regulars of Makeup to Go! will know that I had a series a while back called “So You Wanna Be A Pro Artist” wherein I covered some of the basics of moving from a makeup fan to a professional artist. Without a doubt, one of the most topical of these installments is the Kit Building installation of the series. Click on that and you can see what I had to say about it back then. What I want to share now is how my makeup kit has evolved. First a story:
It was a moment I will never forget; I was doing my first shoot involving celebrity talent. There were two actresses, one of whom was traveling with her own artist (unfortunately I don’t remember who the artist was, but I remember that he beat that face!). I was all nervous and excited and I packed EVERYTHING I could think of in order to be prepared. My actress didn’t care for what I did to her initially, although we were able to get it to more what she had in mind. Enter the 2nd artist; he had about… oh 10 products in total wrapped in a towel. He set out the towel, laid out the 10 or so products and his brush roll and KILT his actresses face. Killed. It. Now admittedly, he knew his talent from working with her before and I did not have that advantage, but what I took away from that moment was an artist who is confident in their skills relies on technique not a myriad of product. This was later confirmed – and I’ve mentioned this before – when I read that aritst Francesca Tolot of Beyonce’s Makeup Artist fame has been known to carry as little as a small Art Box as a kit to jobs. I vowed that day to become one of those artists.
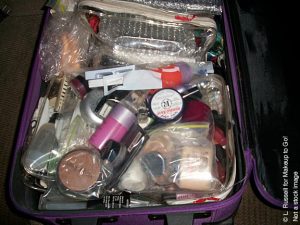
Now I am not saying that this approach is appropriate for every job. I just worked a job this past weekend where I would have loved to have had more product and WAY more brushes with me than I did. That said, however, due to my skill as an artist I was able to make it work. And I do still have different kit set-ups for different occasions (if I am doing both makeup and hair, if it’s an editorial, if it’s video, if it’s a catalog with multiple models, etc. ) but in general I try to carry as LIGHTLY as I possibly can. So what’s changed between my earlier picture of my kit and now? Me. First of all in reading my old kit building article, I thought that kit was paired down and was organized. Oh how times have changed, LOL! Looking at that picture of my kit now it looks a complete disorganized mess to me and I’m carrying way too much product. I work a lot more so I am much more confident as an artist. I also travel a lot now, where carrying 50-zillion items is not a realistic option. In short, I am more pragmatic about what I need and how it’s going to be used. Most of all, however, being more pared down and better organized allows me to be a better artist, which in turn makes me a better asset to my client.
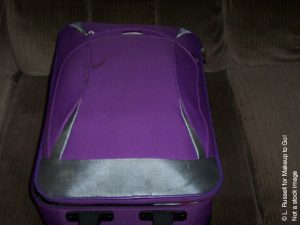
Old Kit – Rolling Luggage Stuffed to the Gills
Nowadays I would likely only carry something like this if I’m doing something with a lot of talent (catalog, video of some kind, etc.)
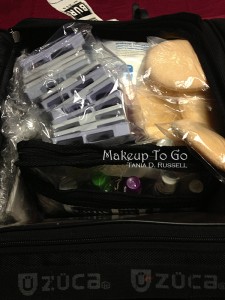
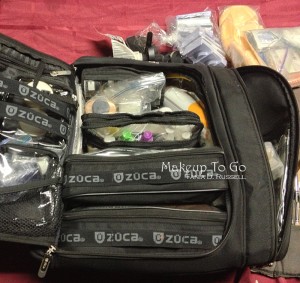
New Kit – Zuca Backpack
This version is my Zuca Backpack set up, which you can see I still have *a lot* of product inside, however I de-pot and palette whenever possible, I carry travel/trial sizes of product where ever possible and practical, and I keep “just in case” extras to a minimum because let’s face it – how often do you really end up using those “just in case” items? Yeah, pretty much.
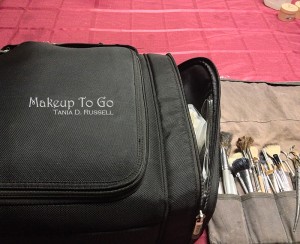
As far as what to use for actual kit storage, that is a very individual choice. I have 3 different kits/bags on rotation depending on the job; A rolling storage bag that’s actually made for photographers, a rolling bag from the Automotive section at Target, and then the Zuca backpack. As much as I love the Zuca backpack is how much I do not love the Zuca rolling kit. The Rolling Kit does not feel sturdy to me and my brain just does not process the organization of it. I’ve also heard of the wheels self-destructing in NYC where artists are less likely to be driving and more likely to be walking the streets and running to subways. This is why I suggest – if at all possible – to buy kits in person and not online. It is really helpful to see a kit and play with it to see how you might organize it for yourself and your needs. Popular kit options on the e-streets right now are Zuca, Stilazzi and Burton (yes, the snowboard brand). Of the three, the Burton bag is most my style and in fact I do plan to get one (and I love that it comes in COLORS as opposed to just Black). People who insist on carrying a lot will likely love the Stilazzi. The “Godfather” Stilazzi is nothing short of completely huge for when you absolutely have to carry everything you own all at once. What people do like about the Stilazzi is the fact that you can work out of your kit, which is good for times when space is limited. 99.9% of the time I would cry if I had to carry a kit that size, but it would have come in handy – both in terms of size and being able to work out of it – for the job I did this past weekend (a TV show taping with a LOT of talent to do). That is why I say you need to know what you’re buying for. If I did that kind of work more often, a kit that size would make sense for me but since I do not it is not practical for me. If you go Zuca, I recommend going with the Artist Collection, which is a more durable construction designed to keep up with the heavy usage an artists’ kit encounters.
Or you can always go to Target, Ross, WalMart, etc. and get some kind of rolling bag/luggage – likely for less than $50 – and call it a day. 🙂
—
Have you signed up for the Makeup to Go Blog newsletter yet? Join the fun for exclusive content, giveaways, and other assorted fabulosity! Makeup to Go Blog Newsletter – “Speaking of Makeup”
Disclosure: Hey folks, instead of doing sponsored posts, Makeup to Go is a member of ShopMy, Amazon Affiliates, and Skimlinks. If you purchase something via any of our links, we get a lil sumthin sumthin to help us keep running, at no additional cost to you. Thanks much!
© 2013 – 2026, Tania. All rights reserved.

